
In my last article, we covered all the basics you need to get started on ANKI:
- Installing ANKI
- Creating an ANKI Web Account
- Importing A2KI (Pre-Made Decks)
- Studying your Deck
If you haven't went through that article yet, I highly encourage you to do so here.
In this article, we'll go through how to create decks, add new cards, edit created cards and modify the review settings to supercharge the way you use ANKI.
As usual, I've included a ToC so you can skip to certain sections if that's what you're here for. Enjoy!
📂 Creating A New Deck
Before creating cards, we have to create a Deck first. Here is what you can do.
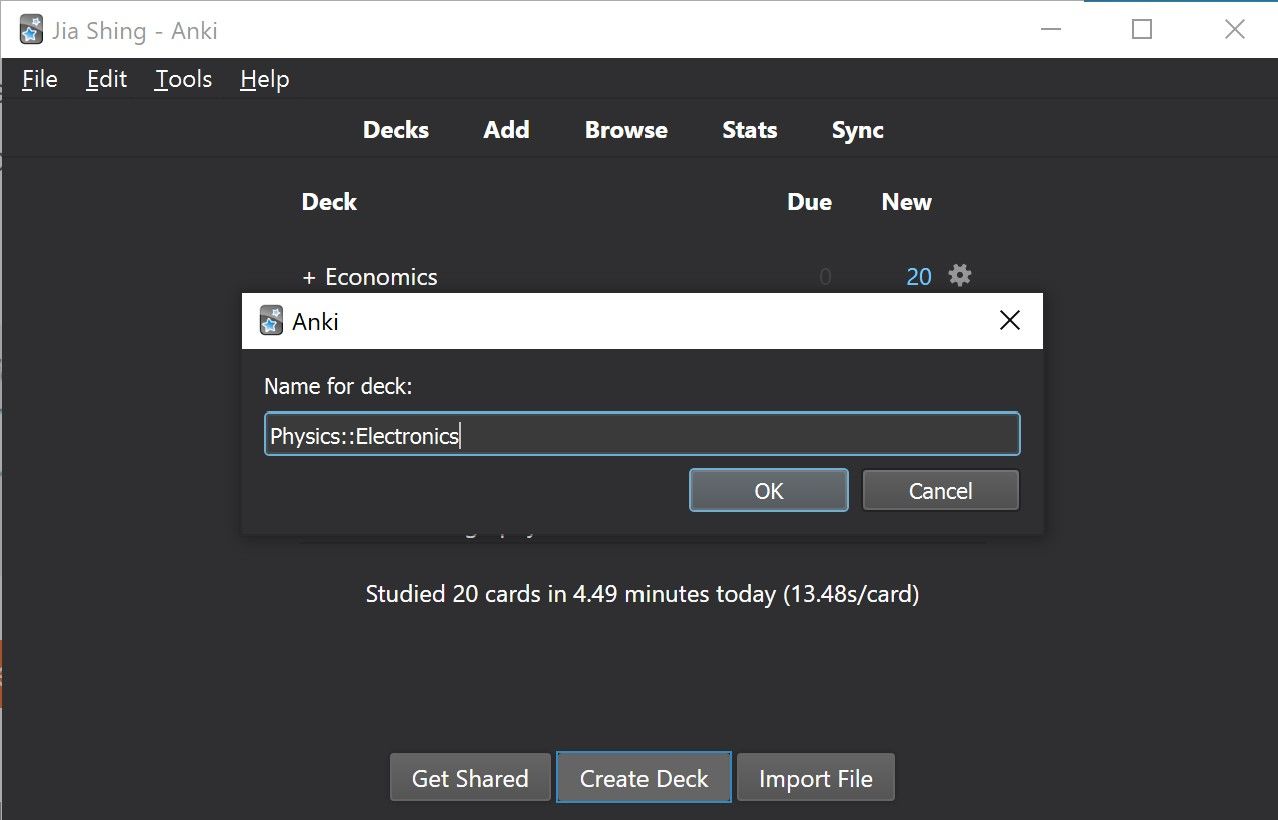
- Click on the button Create Deck placed at the bottom of the screen.

- A Dialog box will appear asking you the name of the Deck. By using the format “MAINDECK::SUBDECK”, you will get create a subdeck. Refer to the pictures below.

📩 Creating Your First Card
Please note that this section is referred from Talking Concepts' Tutorial.
Now that we have our deck, let's move ahead and create our first card.
To add new cards simply click on the Add button present in the menu toolbar or press A from the keyboard. The window for adding cards will appear as it is shown below.
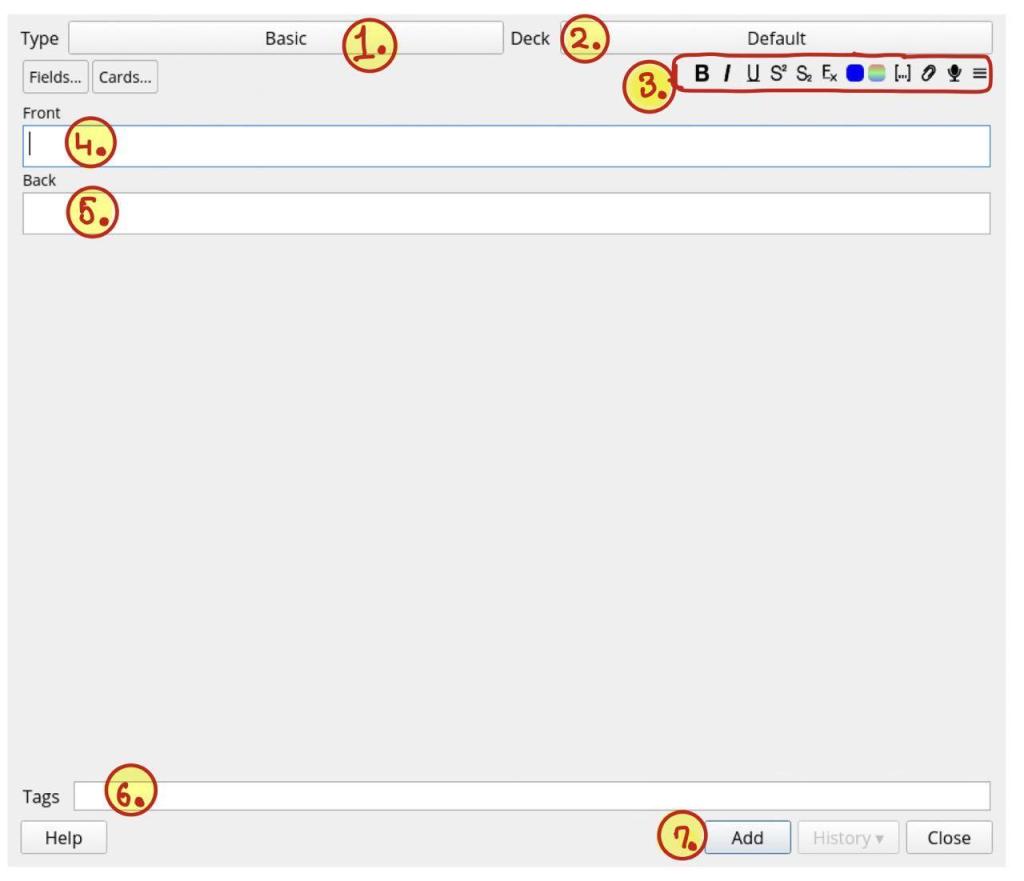
Let's get familiar with the UI:
- Type Button: In Anki, cards can exist in different types. The Type button will help you to choose the type for your new card. There are many types of cards already present for us to choose from. The most important ones are Basic, Cloze and Image Occlusion. And, if any of the card types do not match with your need, you can create your own type of card like True/False, MCQ etc.
- Deck Button: Clicking on this button will allow us to choose the deck where you are about to add the new cards.
- Editing Toolbox: Here you are provided with options such as Bold, Italics, Underline, sub-script, super-script, font-colour etc. for editing of the cards. Aside from that, you can add files, like pictures and sounds. For inserting Mathematical Equation, Latex or MathJax can be used form the drop-down Hamburger menu placed in the extreme left.
- Front Field: This field is for you to enter the Front Side(Question Side) of the Flashcard. Generally, the question is to be placed in this field. You can enter the information in any format like pictures, Latex and text.
- Back Field: This field is for you to enter the Back Side(Answer side) of the Flashcard. Generally, the answer is to be placed in this field. Again, you have the freedom to use any type of formatting for this field.
- Tags Field: This allows you to add tags to your flashcard. It is a good practice to give a tag to your flashcards as it helps you in searching and in making a custom deck.
- Add Button: After you complete filling up the above fields, press this to add a card to your deck. This will reset the Front and Back Field keeping every other option unchanged.To add more cards,you just have to keep entering the new information in the fields and press Add Button. And once you are done with adding cards, to exit the window press close.
✂️ Editing Cards
Now, what if you've created a card and added it to a deck, just to realize 4 cards later that there's something you left out or a fact you mistakenly inserted?
This is where editing comes in handy. Here is how to do it.
- Click Browse or use the shorcut key B to access the Deck Browser.
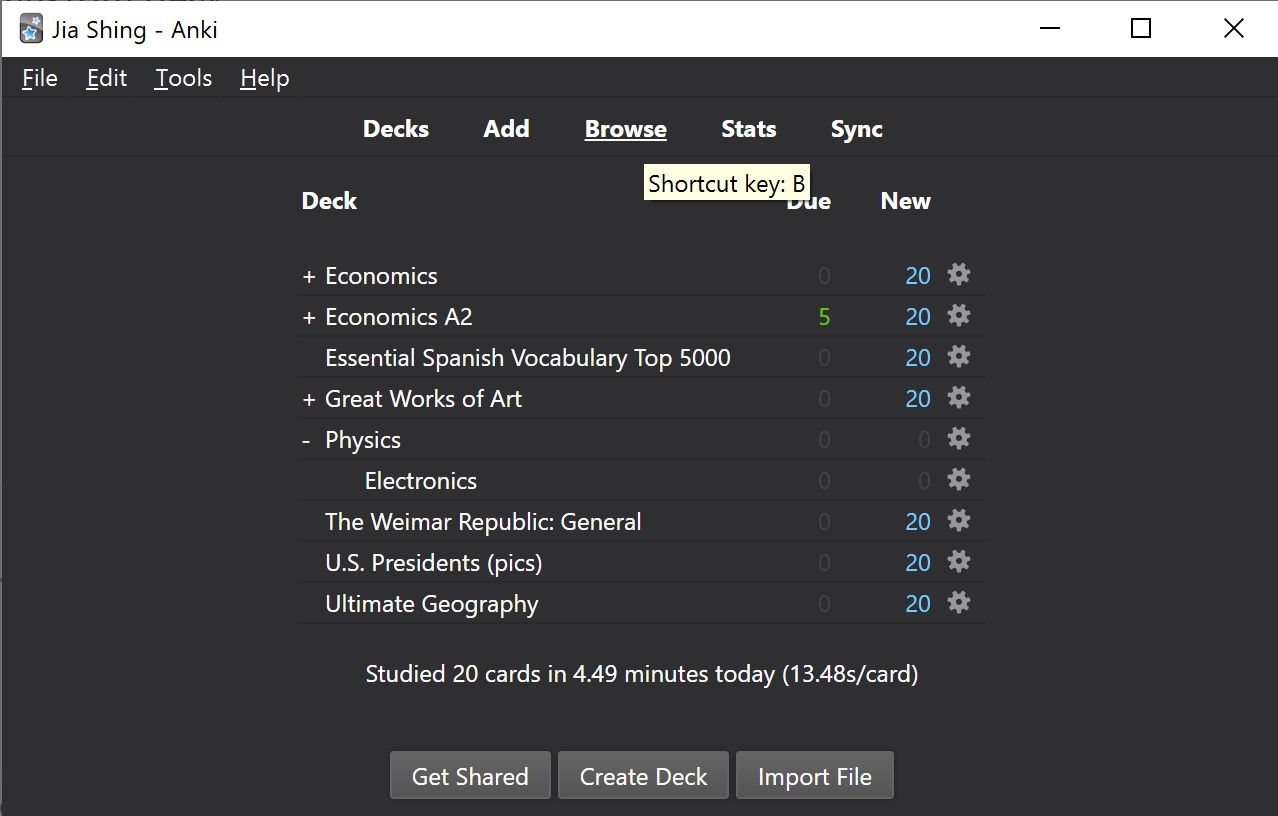
- You will be directed to the Deck Browser on a new Window. Here, you can modify all the contents of your cards and even add styles to them using the options I've circled in white. Besides, you can preview cards by clicking the button I circled in yellow. You can even change your card type (Basic, Cloze, Image Occlusion etc) by clicking the button I circled in blue!

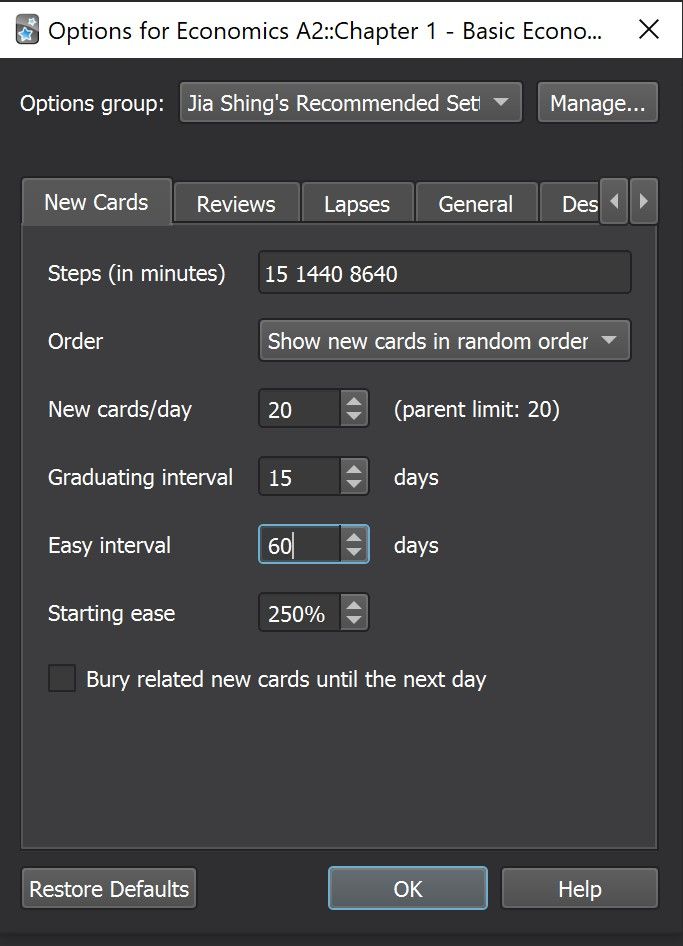
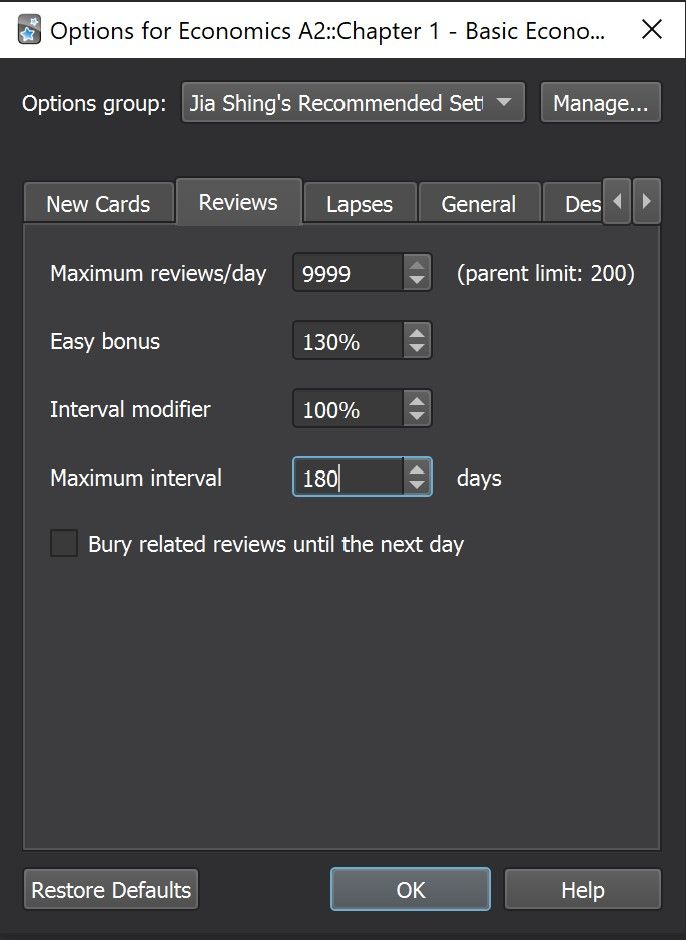
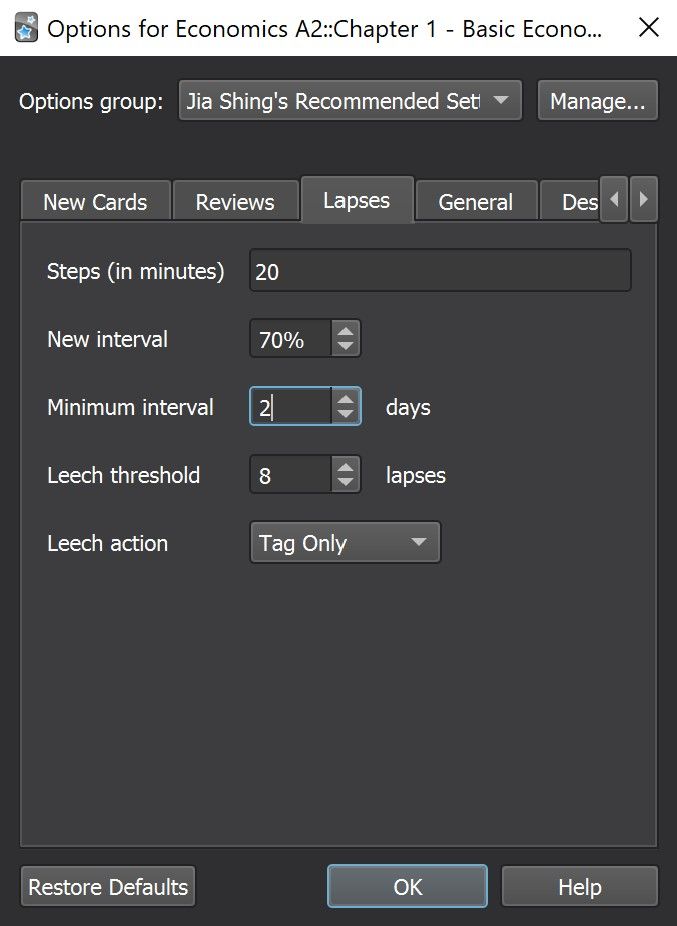
⚙️ Modify Review Settings
You don't need to mess around with the settings too much, but here's what I do.
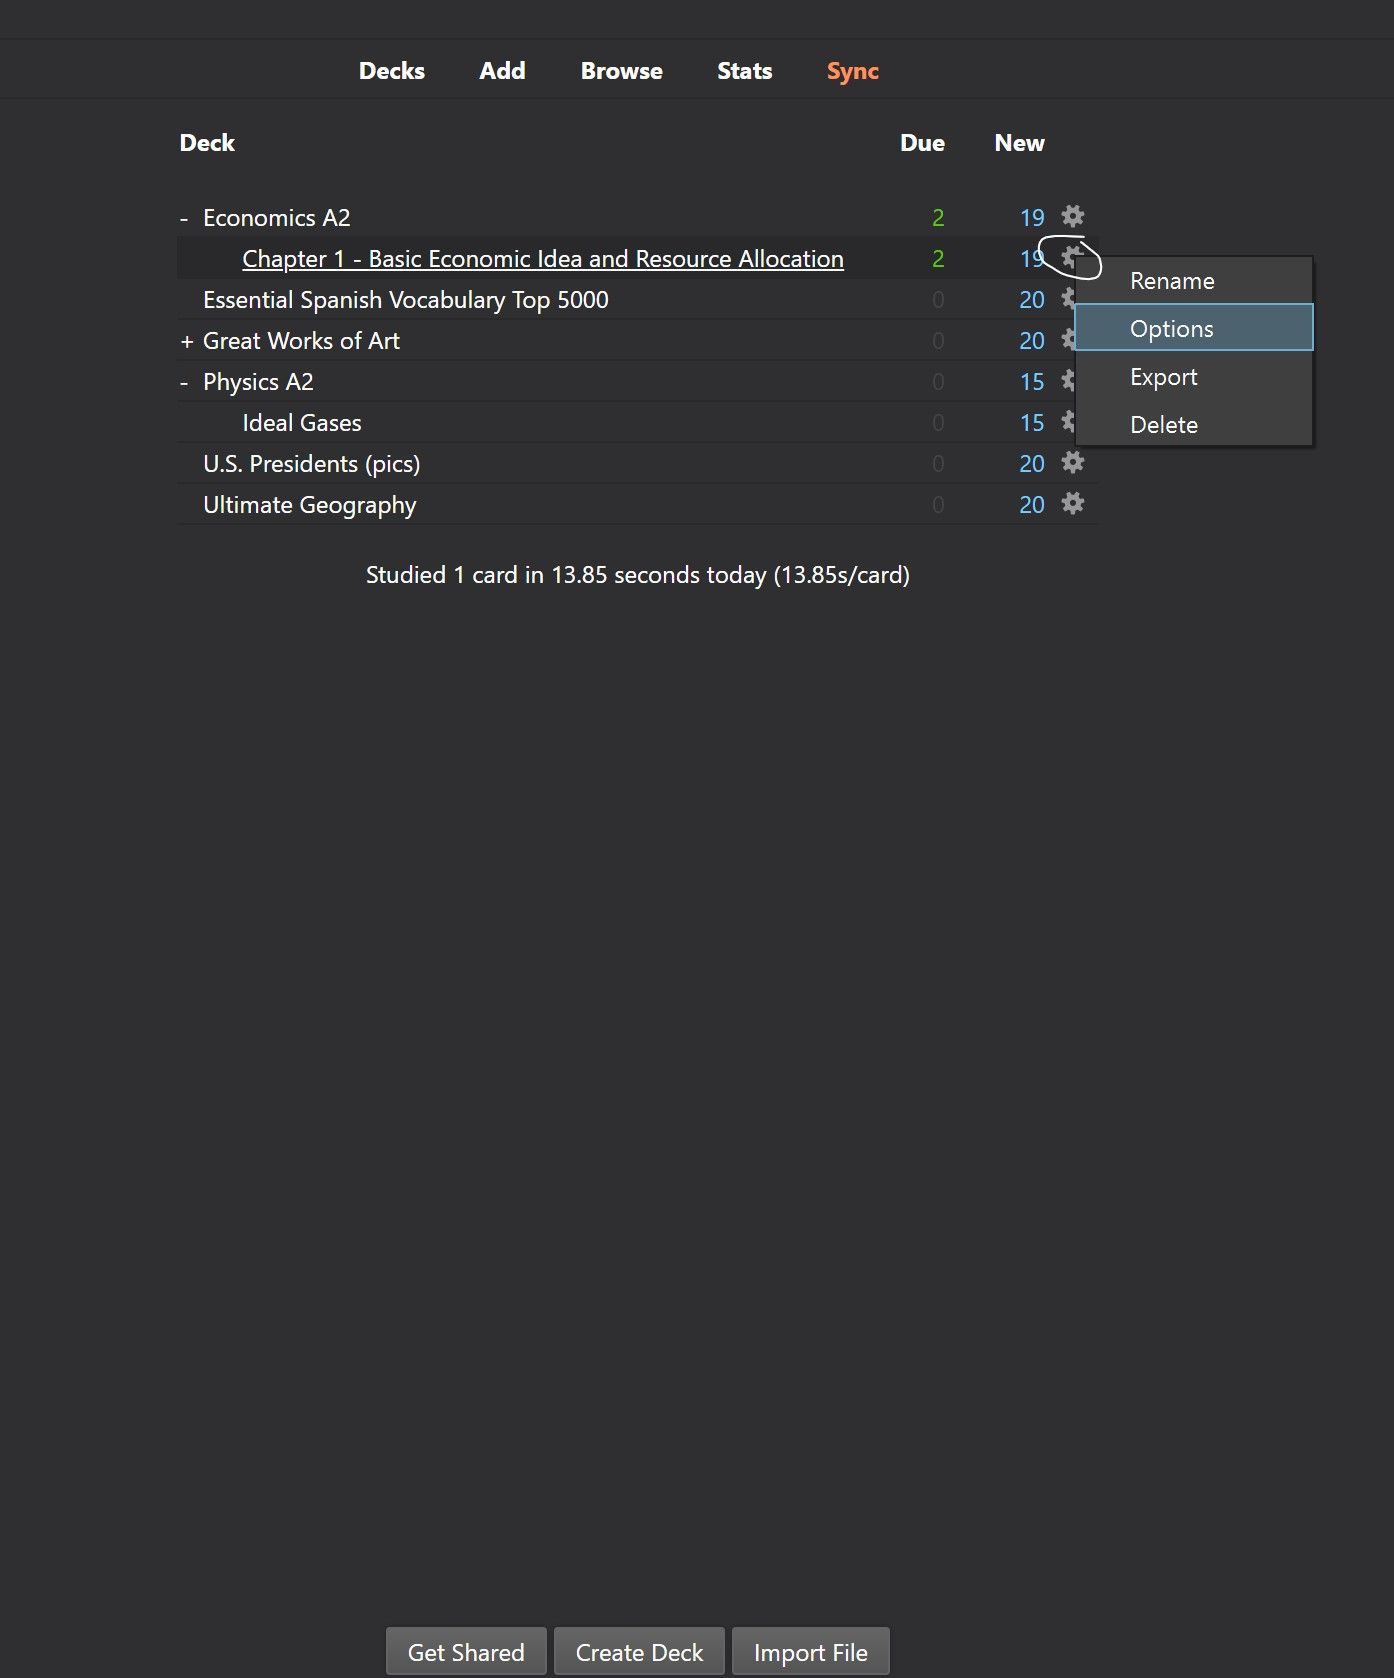
- Click the gear box on the side which will bring a drop-down menu.
- Choose Options.
- In the New Cards, Reviews and Lapses tabs, input the figures as you see in the screenshots below.
That's all for now.
I hope with the screenshots I included, creating decks, modifying settings, adding & editing Cards should now be a breeze for you.
Check out the next part of this series.
ANKI: Keyboard Shortcuts & Add Ons
If you'd like to get yourself some A2KI decks, feel free to place your order here!
Did you enjoy this article?
Consider subscribing to my weekly newsletter, Sunday Scoop🍨 where I share :-
* a short article on a few life lessons I've picked up/productivity method I'm experimenting within the week
* links to the favourite contents I consumed that week
* a question to ponder on for the week (or a challenge if I'm feeling cheeky!)
If this seems interesting to you, feel free to subscribe to my email newsletter below!