
On February 12, 2021, I co-launched a student-led non-profit initiative called A2KI which helps students level up their CAIE A2 Subject Revisions by creating ANKI premade decks. Every last penny of sale made goes to COVID-19 NGOs.
Although ANKI is an absolutely revolutionary software, there's admittedly a learning curve to it. Hence, I thought it'd be a good idea to publish a Quick Launch Guide which I hope will be succinct yet informative enough for you to hit the ground running.
I start the article off by giving you 2 scenarios to illustrate why ANKI would benefit 99% of students before I move on to the Quick Launch Guide.
As usual, I've included a ToC so you can skip to the Guide if that's what you're here for. Enjoy!
Scenario 1
You flip open to the first page of your coursebook, motivated to get through 3 chapters before lunch.
The first page was fine.
And so was the second.
However, you soon find yourself re-reading the same line on a certain page over and over without understanding what its about. Before you know it, 2 hours has passed and you barely got through the first chapter.
You consider it a 'productive study session', tell yourself it's just one of 'those days' and give yourself a pat on the back for 'studying' for 2 hours.
Scenario 2
You've feel confident walking into the exam hall.
You must've gone through the coursebooks cover to cover, ten times over. Last night, when you were reading the mountain of presentation slides from the past semester, didn't you feel like you've seen every single page before?
As you're answering the exam, you seem to have a vague memory about the topics asked but you simply can't decide on the correct answer. Afterall, it was a very small part of the presentation slides and it was 3 months ago!
To add to that, you remember a lot of facts (you've memorised them a million times) but you just can't seem to recall one or two important points because they're tested less frequently and hence you gave them less attention.
Why Use ANKI?
Most students have encountered either one or both of these situations times and again in their academic journey - re-reading and highlighting notes that they've went through countless times, just to forget vital yet tricky parts of the topic that end up on the exam paper come test day.
And that's where the real genius of ANKI lies - the Spaced Repetition algorithm.
Anki schedules your flashcards for you so that you keep seeing them again and again, each time reinforcing your knowledge a bit more. But it doesn’t just repeat them all at the same intervals. In other words, it doesn’t just show you every card once a week.
It actually schedules the cards based on how difficult they are for you. When you study your flashcards it asks you to rate their difficulty as you answer them. The ones that you mark as easy you won’t see as frequently. But the harder ones you'll see more often.
That way you can focus on your weak points, while letting the easier content coast in the background. If you keep up with reviewing your flashcards each day, then you’ll never forget the stuff you put in Anki.
The best thing about ANKI is its completely free and cross platform!
If you'd like to see more reasons to use ANKI, feel free to hop onto A2KI's project website. For now, let's get to the Quick Start Guide
Installing ANKI
💻 For PC
You can download the desktop Anki app for free here: https://apps.ankiweb.net
Assuming you're a millennial and can hence operate a PC fairly well, installing Anki is pretty straightforward. Once it's downloaded, just open the file and let the application install onto your device.
📱 For Phones/Tablets
There’s an Android app which you can download for free.
However, the iOS app costs $25/MYR100.
It is definitely pricey but you can always use Safari to access your ANKI Web account and you can review your decks from there just fine!
If you're an A2KI customer and you genuinely cannot afford the app, please email a2ki@ntwrkz.org with the subject line 'ANKI App 2021' and we will see what we can do to help you out.
Note that Anki full functionality can only be accessed through the Free ANKI Desktop App. The mobile versions are the companions to the main desktop software and they allow users to do the most basic of Anki tasks like creating cards, editing cards, reviewing decks etc.
In this article, my focus will be on the usage of the desktop app only. Once you are familiar with the User-Interface of the desktop version. There will no problem in using the mobile version of it.
👨⚕️ ANKI Anatomy (Skip this if you want to Set Up ASAP)

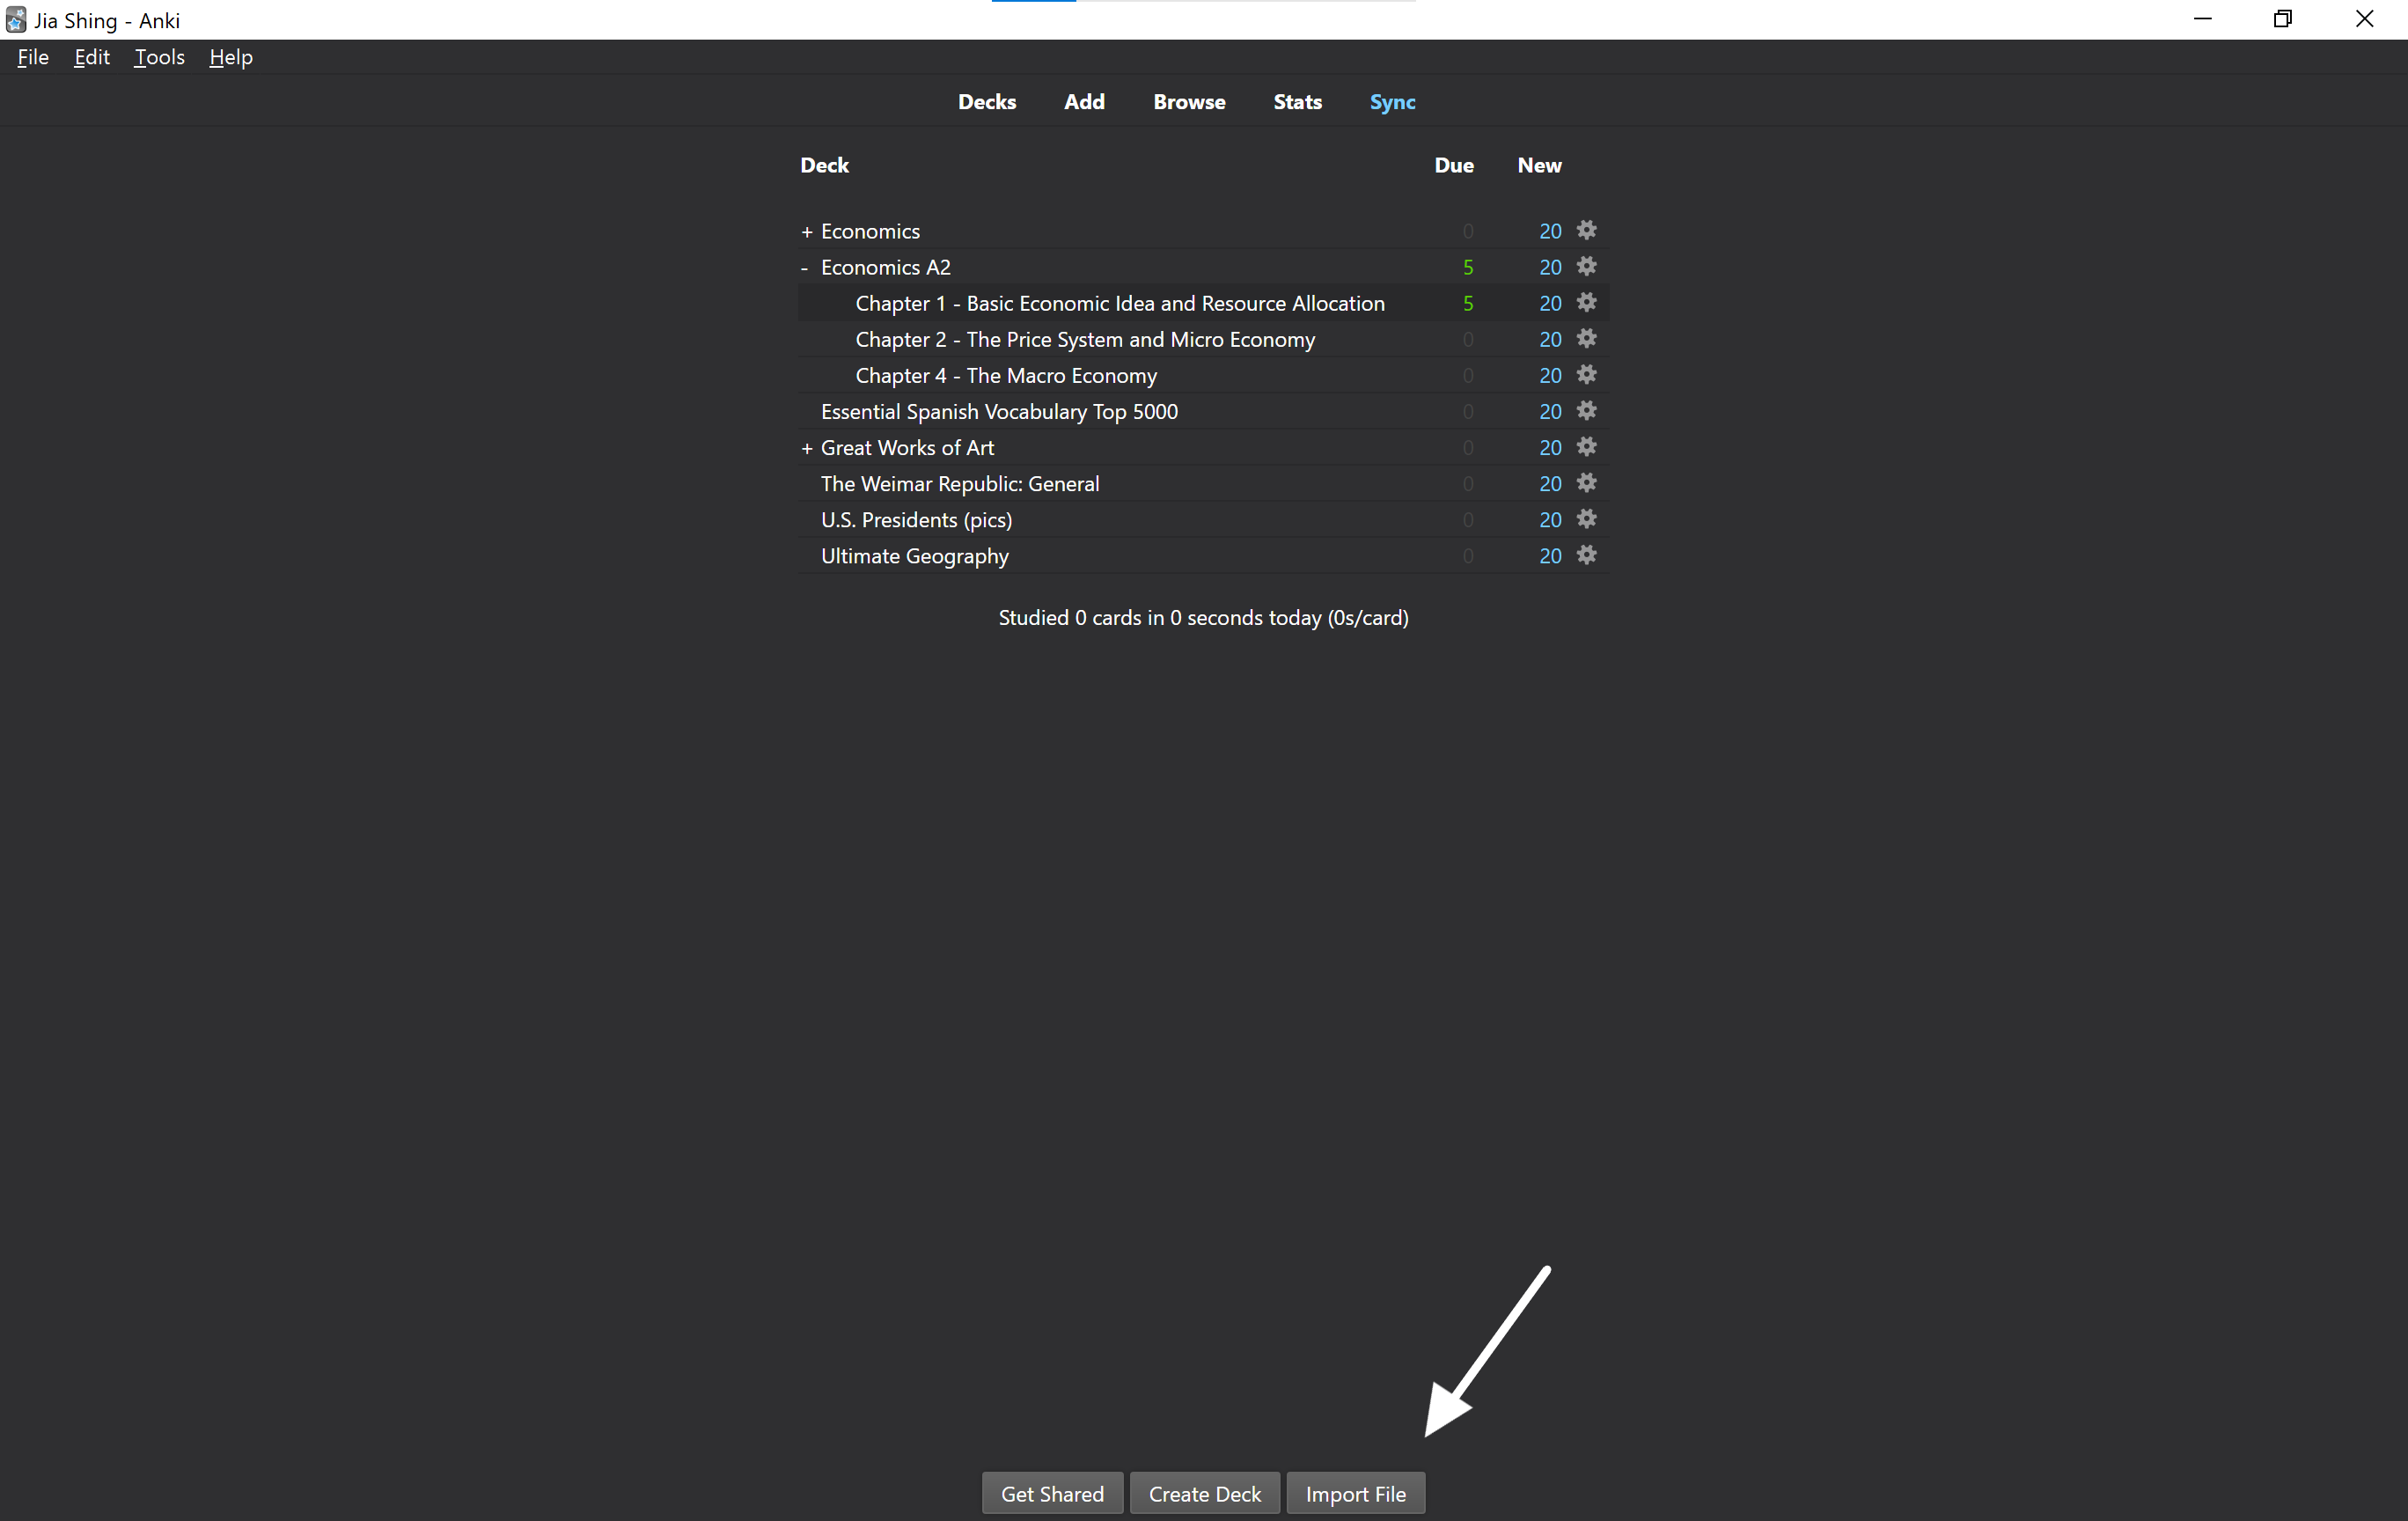
Once you launch ANKI, you'll see these 5 main menus and 3 columns.
I'll start with the 5 main menus on the top row going across horizontally.
Decks - This is your homepage where you access all your decks.
Add - This is where you add new cards to your deck(s).
Browse - This is where you browse your cards and tags across various decks. This is also where you edit cards you've made in the past.
Stats - This page shows your Review Statistics (how many new cards have been added, how often do you review your cards etc)
Sync - This magical button syncs all your decks onto ANKI Web so that you can access them on any of your devices.
Now let's go to the 3 columns.
Deck - The Deck is exactly what it sounds like, it is a place for keeping your flashcards. All your Created/Imported Decks will be in this column.
Due - This column indicates the number of old cards due for review.
New - This column indicates the number of new cards present in the deck which is yet to review.
🌐 Creating ANKI Web Account
Although it's maybe slightly overwhelming to see all of ANKI's menu options, let's take things one at a time and create an online account first.
Your ANKI Web account will enable you to keep yours cards safe in the cloud and synchronised with other devices. Here is what you should do.
- Click on the Sync button placed in toolbar menu.

- A dialog box will appear, like the one shown below.
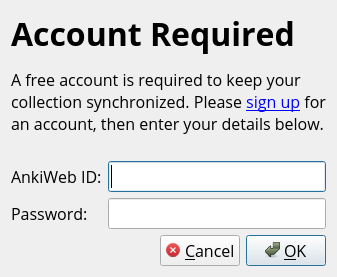
- Click on the sign-up link and create an account in ankiweb.net.
- Using your newly created login ID and password, login into your account.
🚢 Importing Your First Deck
If you're an A2KI customer (and you probably should!), here's how you import your first A2KI deck.
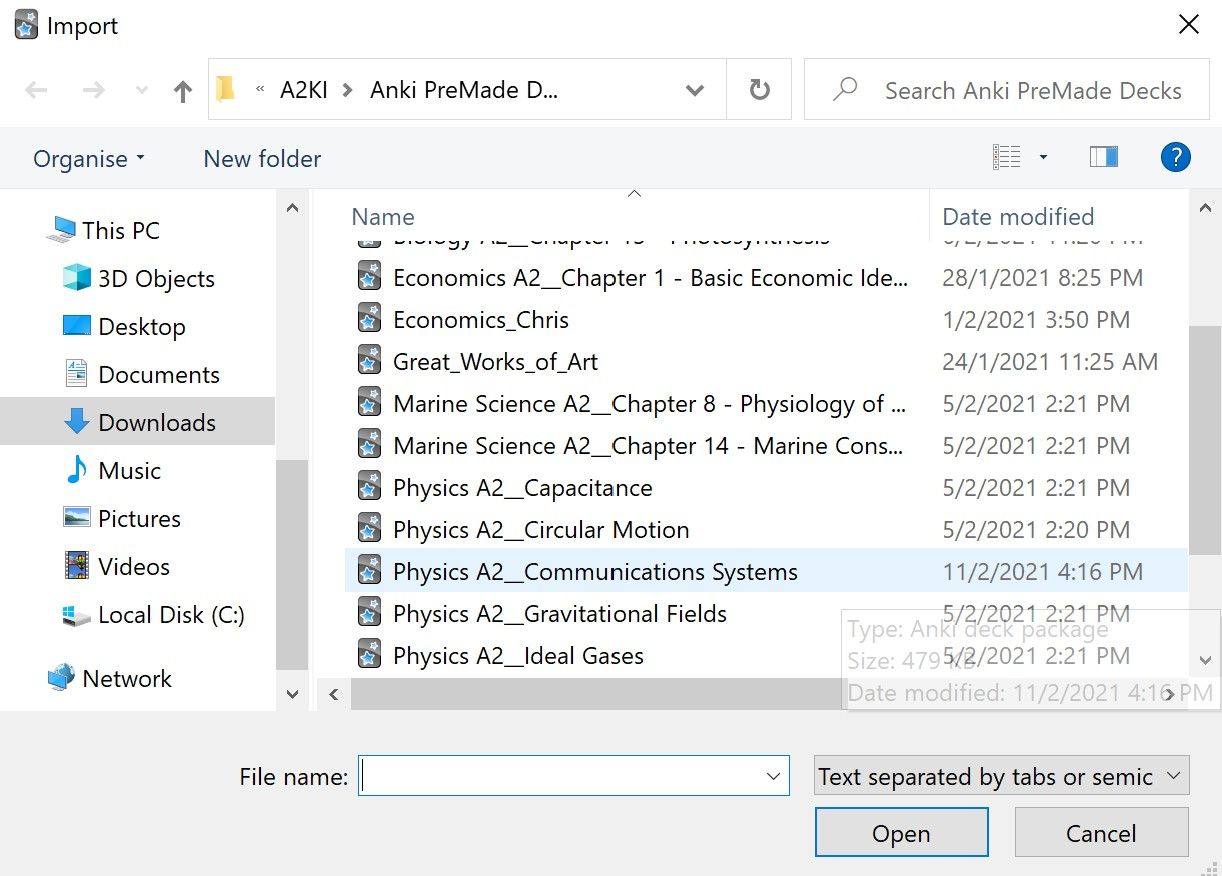
- Click the 'Import File' button located at the bottom of your ANKI Dashboard.
- Choose the file that you wish to import into ANKI.
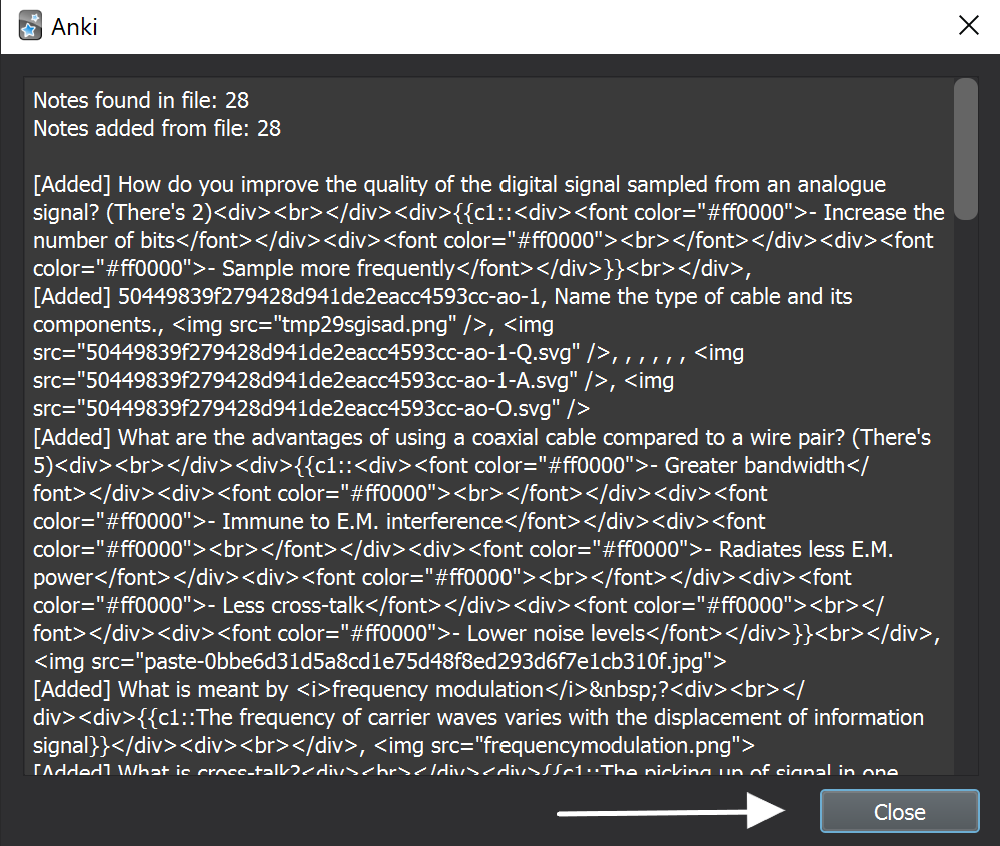
- Once ANKI is done importing, a dialog box will appear. Click the 'Close' button.
- In your Deck column, you'll see that your deck has been successfully imported.

Congratulations, you may begin studying with ANKI now!
📚 Studying the Deck
- Click on the Deck you wish to study and you will be directed to the screen below.
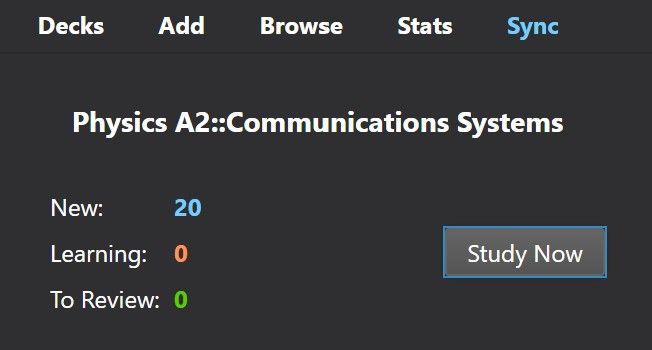
- Since my Deck was just imported, ANKI tells me that there are 20 new cards that I should learn today and there are no cards to review. Click on the Button 'Study Now'. to be redirected to the screen below to start studying.
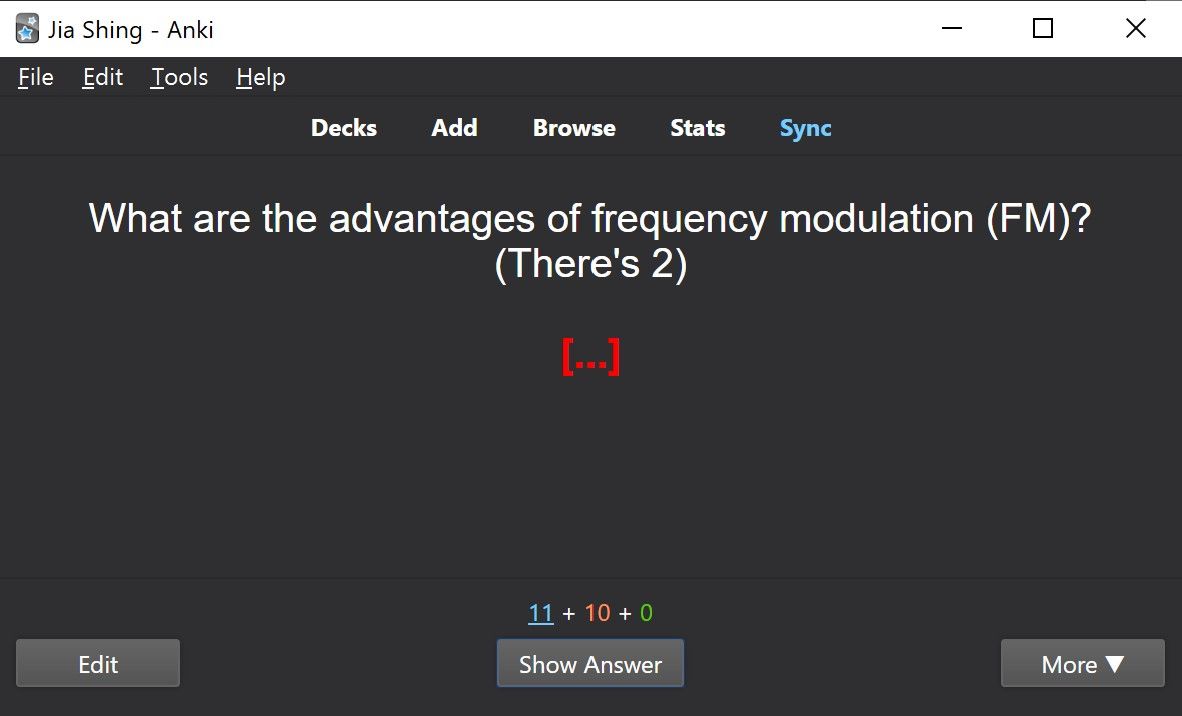
- After reading the card, try to correctly answer it. Once you have an answer in mind, click on the button Show Answer to check if you were correct.
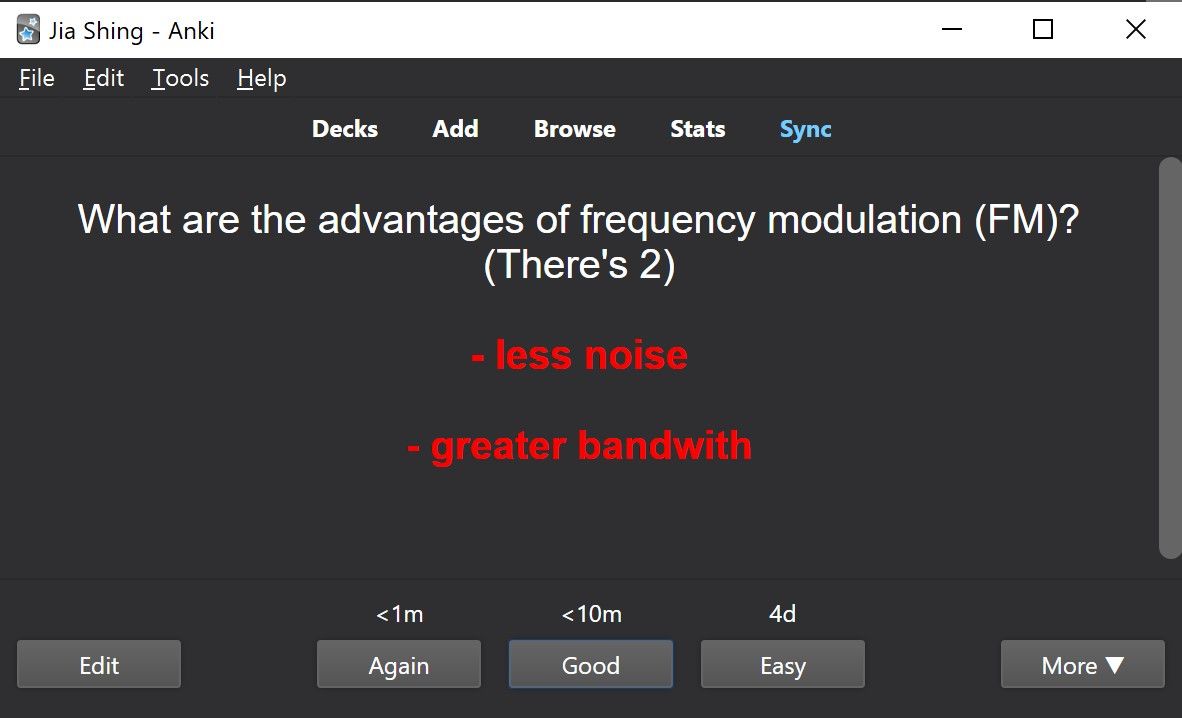
- Now, pay attention to this part. After you have clicked the Show Answer button, the following options will appear.
- Again - Click this button when you have no clue what the answer would be. This will tell ANKI to ask you this question more frequently.
- Good - Click this button when you can answer the question but your answer is not complete or partially incorrect OR when you hesitate way too long before you answer because you have doubts
- Easy - Don't click this button unless you're absolutely sure of the answer and you can answer it within seconds.
This part of using Anki is really important for Anki to work effectively. You have to be very honest about choosing the right option.
Your task will be to complete the review in your decks everyday till you see this screen which reads “Congratulations! You have finished this deck for now.“
That's all for now.
I tried my best to keep this guide as concise as possible.
I hope with the screenshots I included, installing ANKI and importing Pre-Made Decks should now be a breeze for you.
Check out the following 2 parts from this series.
If you'd like to get yourself some A2KI decks, feel free to place your order here!
Did you enjoy this article?
Consider subscribing to my weekly newsletter, Sunday Scoop🍨 where I share :-
* a short article on a few life lessons I've picked up/productivity method I'm experimenting within the week
* links to the favourite contents I consumed that week
* a question to ponder on for the week (or a challenge if I'm feeling cheeky!)
If this seems interesting to you, feel free to subscribe to my email newsletter below!